Monday, February 18, 2013

How to Paint Perfectly Crisp and Straight Lines on Walls

How to Paint Perfectly Crisp and Straight Lines on Walls - welcome friend, how are you today? .. hopefully ok, before I say thank you have been to blog Home Design Help okay on this occasion we will discuss How to Paint Perfectly Crisp and Straight Lines on Walls besides this article we have also provided a lot of information about the design of the house which is very interesting to see, please later to visit the other pages of this blog, let now please continue to read:

You can also see our article on:


How to Paint Perfectly Crisp and Straight Lines on Walls

After this post, some of you emailed for tips on painting really crisp and straight lines on walls. I have a simple approach, but it works every time for me! One little disclaimer though - stripes don't work well on highly textured walls. The lines just never look perfect, which would bug me a bit. So, best to attempt stripes only if you have smooth or close to smooth walls.
(Oooh! An update from the comments section: If you have textured walls, use caulking to seal the tape and you lines will be straight!!) 


To start, use a ruler to make your registration marks. My stripes are 8" wide, so I made a little mark with a pencil 8" above the floor board, every 18" or so around the wall of the closet, making sure to mark at the corners and turns especially. Then just measure and mark 8" above every one of those marks, going all the way up the wall.


Then use painters tape to connect the marks. Try hard to not bend the tape. If you pull the tape out gently and straight, you can trust that your lines will also be straight.

You can see here that the stripes don't look evenly spaced (because they're not). You'll need to tape above the registration mark and then below the registration mark to block out the full 8" for the stripe.


Then go back over the tape with your thumb and really smooth out and lay down the tape, just on the edges you'll be painting.


Here's the real trick for perfectly crisp lines: seal the edges of the painters tape with some of the base wall color before painting on the contrasting color. Don't paint the whole width of the tape. Just a bit along the edge of the tape on the side where the stripe will be painted.


Let that dry before you paint on the stripe color.


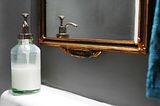
For my stripe color, I wanted to do a gray that sort of coordinated with the gray I just painted in my powder bath, since the doors are across the hall, only about three feet apart from each other. I didn't want to do the exact same color and I wanted something much lighter, so I mixed about one part BM Chelsea Gray with two parts White Dove.


You can roll or brush on the stripe color, and then I like to pull the tape off while the paint is still wet. I don't think it matters either way though, if you prefer waiting til it's dry. (#impatient)


Check out those lines! Not a bit of paint bled through because that extra little strep of sealing the edges with the base coat paint. I've used all brands of painters tape before too, and none of them give me the same results without doing the sealing step.


It's one of those completely satisfying projects that moves pretty fast. I busted out this closet in about two hours.


PS Some of you asked about the citron boxes I have on the shelf here. They're shoe boxes from Crewcuts! Ha! J. Crew is having an additional 40% off sale items plus free shipping, so how could I resist picking up some new spring kicks for the girls? The cute, sturdy boxes were a little bonus though, for sure. :)


thank you for reading our article on How to Paint Perfectly Crisp and Straight Lines on Walls you can book mark in the link https://notreadymaketonice.blogspot.com/2013/02/how-to-paint-perfectly-crisp-and.html can you share also to be beneficial to many people, hopefully this article can provide greater insight into the design of the house the latest evolving

Share on Facebook
Share on Twitter
Share on Google+

Related : How to Paint Perfectly Crisp and Straight Lines on Walls

  • Reader DIY: Stenciled Kitchen FloorsI'm a big fan of old encaustic tile used in kitchens (I'm using a repro version in a laundry room project). This kitchen from Kristen Buckingham that features the pretti ...
  • DIY: Painting a Brass ChandelierWhen I was hospitalized with tetanus shortly after we moved to Brooklyn, my mom flew out to help. She saved the day and helped keep the house running and distracted my g ...
  • Powder Bath UpdatesI have been looking for a new mirror for our powder bath for a while (you can see the super boring, plastic(!) old mirror here). The corner sink is so teeny that the dim ...
  • Closing off the Coat Closet: From Bi-fold Door to Hinged Swing DoorSomething we have been wanting to check off of our list since long before we started our renovation, was to transition our coat closet doors from bi-fold style to a swin ...
  • DIY Pretty PVC ContainersToday's project was initially dreamt up the moment I spotted some sweet little planters from Urban Outfitters.  I fell in love with their gold versatility and at ar ...

0 comments:

Post a Comment